In today’s lesson, we went through more tools and tricks to use on photoshop. We learned the term adjustments and what non-destructive and destructive means.
-Non-destructive = on–destructive editing is a method of editing in Photoshop that allows you to make changes to an image without overwriting the original image data.
Destructive= allows you to make changes to an image on photoshop however unlike NDE once you make a change you can’t reverse it and it infects changes the image permanently destroying the previous pixels thus being called destructive.

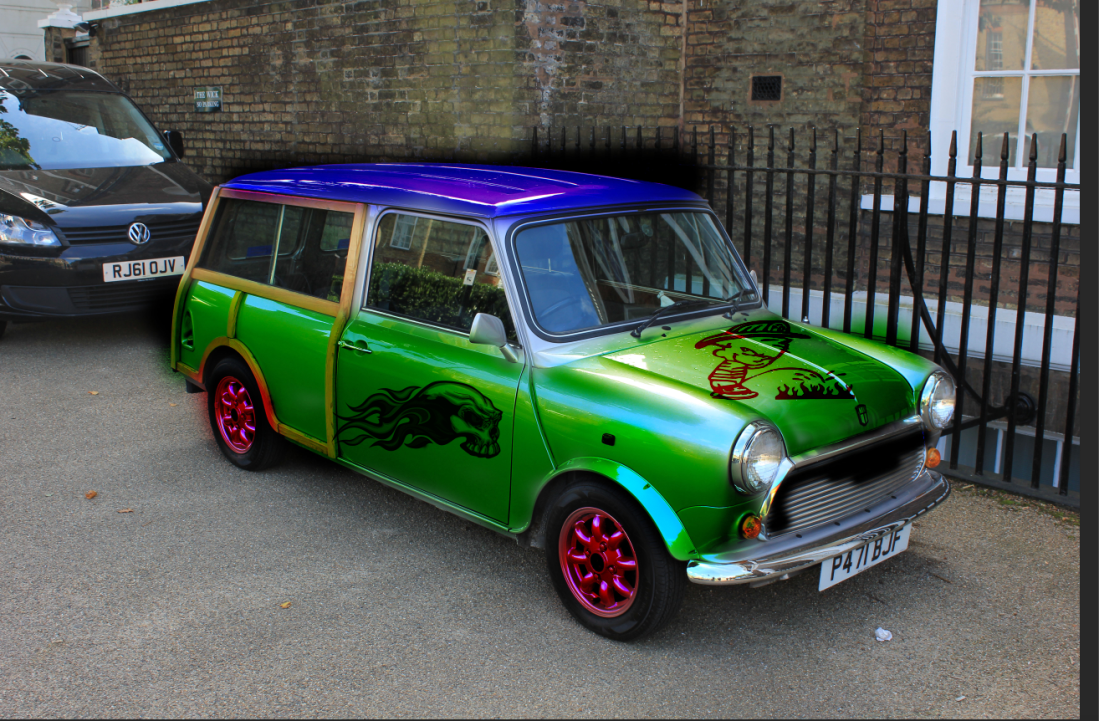
Above is a zoomed in image of the non destructive piece I did. I Decided to post this picture as it shows some of the steps I went through to see my Non destructive image developed. So firstly you can see that I have two layers beside my picture. The first is for the decal That I place on the hood of the car and the second is the background itself. I decided to edit my decals and on one layer as that means if I want to remove it in the future or make changes to it I can without harming the actual image itself. As well as this I decided to also coat my car in green. When I completed this I ran into a occurring problem which was It didn’t look realistic enough. To rectify this I highlighted my coat and changed it to linear burn. This gave the cat a glossy but realistic finish. It helped define the paint as well as add reflection when needed.
This is what my final product looked like for my Non destructive piece. As you can see I madealot of changes. I changed the colour scheme added decals and tinted the windows. Although it is complete I still need to touch up on the hood and bonnet of the car finishing my rendering so both parts look the part, however besides from that This is an example of what type of tools and tricks you can implement to creat a non destructive piece

